Product added to cart
Everything you need to know about tubeless tyre sealants
Switching to tubeless tyres is one of the best decisions a cyclist can make. Fewer punctures, lower pressures for better grip, and the comfort of riding without sudden stops to replace inner tubes. But to enjoy these benefits, one key element is essential — a quality sealant. It's the sealant that makes the tubeless system work seamlessly, automatically repairing minor punctures whilst riding. Choosing the right sealant and applying it correctly determines whether you'll pedal stress-free for years or constantly stop with a flat tyre.
How sealant works and why it's essential
Sealant isn't just an ordinary liquid — it's an intelligent chemical solution that responds to punctures in real time. Understanding how it works helps appreciate why it's absolutely essential in any tubeless setup.
The self-sealing mechanism — science in action
Sealant is a suspension of solid particles in a latex-based solution. When inside the tyre, the liquid evenly coats the interior surface, creating a thin layer across the entire inner wall. When a puncture occurs — from a thorn, sharp stone, or glass shard — pressure forces the liquid out through the hole. Upon contact with air, the latex begins to dry rapidly, and the solid particles accumulate around the edges of the hole.
These suspended particles form a plug that hardens progressively as the latex polymerises. As a result, the puncture is sealed — often within seconds. The cyclist may not even notice anything has happened. A single bottle of sealant can independently repair dozens of minor punctures throughout an entire season.
Why tubeless riding without sealant isn't practical
Theoretically, a tubeless tyre can be mounted without sealant — but in practice, it's inadvisable. Tyres and rims aren't 100% airtight. Even without a puncture, air slowly escapes through microscopic irregularities in the tyre-to-rim seal and through the porous structure of the tyre itself. Without sealant, the tyre loses pressure within hours or days, requiring frequent inflation.
Worse still, any small thorn or splinter immediately causes complete deflation. Without sealant, the tubeless system loses its purpose — instead of trouble-free riding, there are constant pressure and puncture issues. Sealant transforms unpredictable tyres into a reliable, self-repairing system.
What punctures can sealant repair, and which are beyond its capabilities?
Sealants aren't a magic potion that fixes everything. Their capabilities are impressive, but they have limits worth knowing before setting off on a long ride.
Small and medium punctures — automatic repair
Typical punctures from thorns, sharp stones, brambles, or small glass shards are the sealant's bread and butter. Holes up to 3–4 mm in diameter usually seal instantly, often without noticeable pressure loss. Even slightly larger punctures — up to 5–6 mm — may be repaired, though sometimes a brief stop is needed to allow the liquid to gather around the hole.
In practice, this means stress-free riding across sharp gravel, dry forest trails with thorns, or technical singletrack where small spikes and stones regularly penetrate the tread. Instead of stopping every few kilometres to replace an inner tube, the sealant repairs punctures on the go, allowing focus to remain on the ride.
Large punctures and cuts — the limits of capability
Larger holes — above 6–7 mm — present a challenge beyond most sealants' capabilities. Too large an opening means air escapes faster than the sealant can form a plug. The liquid simply flows out without time to solidify. The same applies to sidewall cuts or long tread slashes.
In such situations, a tubeless plug offers rescue — a rubber strip that mechanically blocks the hole, giving the sealant a chance to seal the opening from inside. A plug plus sealant is a combination capable of repairing even significant damage. In extreme cases — sidewall tears or deep cuts — the only solution is temporarily fitting an inner tube and finishing the route in emergency mode.
How to choose the right sealant for your needs
Not every sealant performs identically. Formulas differ in composition, sealing speed, and longevity. Selecting the appropriate product is the first step to trouble-free tubeless riding.
Types of sealants — differences in composition and performance
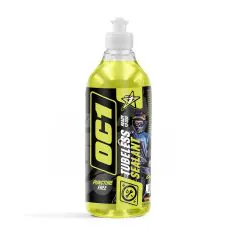
Most sealants are based on natural or synthetic latex. Natural latex is effective but contains ammonia, which can trigger allergic reactions and has a characteristic unpleasant odour. Over time, the ammonia evaporates, causing the sealant to dry out faster. Synthetic latex-based sealants — such as OC1 Tubeless Sealant — eliminate these issues, offering effective sealing without ammonia or allergic reactions.
Some sealants contain additives that accelerate clotting — fibres, crystals, or microparticles that block larger holes more quickly. Others prioritise formula longevity, minimising evaporation and drying. The best products combine both qualities — rapid sealing of small and medium punctures with durability that allows forgetting about the sealant for several months.
Matching to riding style and conditions
Road cyclists prioritise low weight and minimal rolling resistance. They use high pressures — often 5–7 bar — requiring a sealant capable of working in such extreme conditions. OC1 Tubeless Sealant was designed with high-pressure road setups in mind, where every gram and every watt matters.
Conversely, mountain bikers — particularly those riding downhill, enduro, or gravel — prioritise durability and effectiveness at low pressures. Here, tyres operate at 1.5–3 bar, and punctures are more frequent and varied. A quality sealant must effectively seal thorns, stones, and rock edges whilst remaining fluid throughout the season despite shocks and vibrations. OC1 Tubeless Sealant performs well in both high-pressure and low-pressure applications, making it a universal solution for all disciplines.
Step-by-step sealant application
Proper sealant application isn't a complicated procedure. A few simple steps and the right tools are all it takes to prepare tyres for the season in just a few minutes.
Preparation and tools
Before application, ensure the tyre is clean and dry inside. Residues of old sealant, dirt, or moisture can impair the new liquid's performance. When replacing old sealant, rinse the tyre interior with water and dry thoroughly.
Required items: fresh sealant in the appropriate quantity, a syringe or bottle with applicator, a valve core tool (optional), and a pump or compressor. The amount of sealant depends on tyre size — for 25–28 mm road tyres, 60–80 ml per tyre is sufficient; for 2.2–2.4" MTB tyres, approximately 80–100 ml; and for plus or fat bike tyres, even 120–150 ml. Manufacturers typically provide precise recommendations on the label.
Application through the valve or by removal
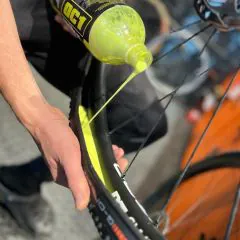
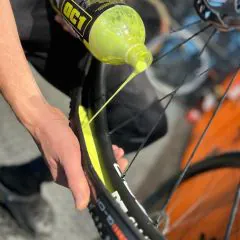
Two application methods exist. The first involves injecting sealant through the valve — quick and convenient when the tyre is already mounted. Unscrew the valve core (the small element inside the stem that holds air), use a syringe or applicator to inject sealant directly into the tyre, then screw the core back in and inflate.
The second method involves removing one side of the tyre and pouring sealant directly inside. This method is slightly more labour-intensive but allows better control over the liquid quantity and ensures even distribution. After pouring in the sealant, remount the tyre, inflate, and rotate the wheel several times so the liquid coats the entire inner surface.
Distribution and airtightness test
After inflation, rotate the wheel in all directions — up, down, sideways — so the sealant evenly coats the tyre interior. Move the wheel for a few minutes, or ideally walk the bicycle a few dozen metres or take a short ride. This ensures the sealant reaches every corner and seals any micro-leaks.
Check the pressure the following day. If the tyre maintains pressure without noticeable loss, everything is working correctly. If pressure drops rapidly, the tyre may not have seated properly on the rim, the valve may be leaking, or there's a larger leak requiring additional attention. It's also worth checking whether sealant is escaping from the valve — sometimes a small amount of liquid can seep through the core, requiring cleaning.
Maintenance and replacement — maintaining full effectiveness
Sealant isn't a "pour and forget" product. It requires regular checking and topping up to ensure the system works reliably throughout the season.
How long does sealant last and what affects its lifespan?
Typical sealant maintains effectiveness for 3–6 months, though much depends on conditions. High temperatures accelerate evaporation — in hot summers, the liquid dries faster than in cooler months. Intensive riding with frequent punctures also consumes sealant, as each seal uses some of the liquid.
Tyres left standing in a garage for extended periods also lose sealant effectiveness. The latex settles at the bottom, forming clumps that are difficult to redissolve. Therefore, even without regular riding, it's worth rotating the wheels and agitating the sealant every few weeks.
When and how to top up the liquid
The simplest test is shaking the wheel. If clear splashing is audible, the sealant is in good condition. If there's dry rattling or complete silence, the liquid has likely dried out and needs topping up. Another method is observing pressure loss — if the tyre deflates faster than usual, the sealant has probably lost effectiveness.
Topping up is a simple process — exactly the same as the initial application. Inject the appropriate amount of fresh sealant through the valve, inflate, and rotate the wheel. There's no need to remove old liquid unless significant dried clumps have accumulated inside. In such cases, it's worth removing the tyre, rinsing the interior, and starting fresh.
Common problems and their solutions
Even the best sealant occasionally causes issues. Knowing typical challenges and how to resolve them saves time and frustration.
Sealant won't hold larger punctures. If the hole is too large (above 5–6 mm), sealant alone isn't sufficient. The solution is a tubeless plug — a rubber strip inserted mechanically into the hole. After fitting the plug, the sealant seals the opening from inside, creating a durable bond.
The valve becomes blocked. Sealant particles can accumulate around the valve core, making inflation difficult or causing leaks. The solution is regular valve cleaning — unscrew the core, rinse with water, dry, and refit.
Sealant leaks through porous tyres. Some tyres, especially older or cheaper models, have overly porous sidewall structures. Sealant seeps through, creating white, sticky patches on the sides. The solution is using additional rim tape or replacing the tyre with a higher-quality model.
The tyre hasn't seated properly. Sometimes the tyre won't "click" onto the rim during initial inflation. Sealant makes this more difficult by reducing surface tension. The solution is inflating the tyre without sealant using a compressor or high-pressure pump until it seats, then adding the liquid.
Why OC1 Tubeless Sealant is a reliable choice
Many sealants are available on the market, but not all offer the same quality and versatility. OC1 Tubeless Sealant was designed for cyclists who demand reliable performance in all conditions.
Ammonia-free synthetic latex. This means no unpleasant odour and zero risk of allergic reactions. The product is safe for sensitive skin and more pleasant to use than traditional natural latex-based sealants.
Effective at any pressure. OC1 Tubeless Sealant performs well with the high pressures of road bikes (6–7 bar) as well as the low pressures used in MTB, gravel, or downhill (1.5–3 bar). One product covers all disciplines.
Seals porous tyres and tape. The formula adheres to the entire tyre interior, sealing micro-leaks in the tyre structure and rim tape. This ensures airtightness even with problematic setups.
Long-lasting effectiveness. Thanks to a stable formula, the sealant maintains effectiveness for 3–6 months, minimising the need for frequent topping up. This saves time and money in the long term.
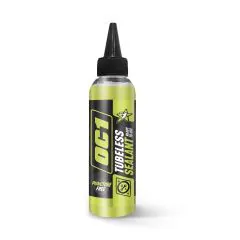
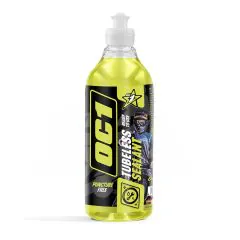
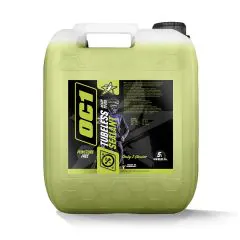
Flexible packaging options. Availability in various sizes — 140 ml, 450 ml, 950 ml, and 5 l — means everyone can find a size suited to their needs. Individual cyclists can choose a small bottle, whilst workshops and teams benefit from economical 5-litre containers.
Summary
Switching to tubeless tyres is a decision most cyclists don't regret. Fewer punctures, better grip, greater comfort, and weight savings are benefits that quickly become apparent. But to enjoy these advantages fully, a reliable sealant is needed — one that works quietly in the background, repairing punctures before they're even noticed.
OC1 Tubeless Sealant is a product that eliminates uncertainty. Its synthetic formula, effectiveness at any pressure, and long-lasting performance mean focusing on the ride without worrying about tyre condition. Proper application, regular maintenance, and basic understanding of how the system works are all that's needed for stress-free riding throughout the season.